

Overview
The AEDG Design team had been brought in to assist with upgrades to the Touch Hand project in preparation for a combined UKZN/NMU team's participation in the Cybathlon event originally intended for Zurich, Switzerland. The CoVid pandemic saw the event changed to an online event which was held in November at the Stopforth Research Lab at UKZN.
Up to this point, this collaborative project has seen an initial hand model designed and 3D printed with assistance from Rapid3D. This was then iterated by further design upgrades to its 4th Design iteration, most recently to also include basic electronics & control systems over the last few years.
The Cybathlon event requires the participating team and their amputee team member to carry out 24 predetermined tasks across 6 stations utilizing the Touch Hand-Socket prosthetic to complete these tasks, against other competing teams from across the globe. The UKZN/NMU team are the only African entry, so not only represent South Africa, but the entire continent of Africa in this exciting tournament.
The initial task of the AEDG Design team was to further enhance the current design to make the Touch Hand even more proficient at its upcoming tasks as required by the Cybathlon, some of which are as intricate as picking up a matchstick, unbuttoning a jacket and tying a shoelace!...a serious challenge indeed.
As 2020 played out, this blog diary will keep you up to date on the progress of these design enhancements...
Project Objectives
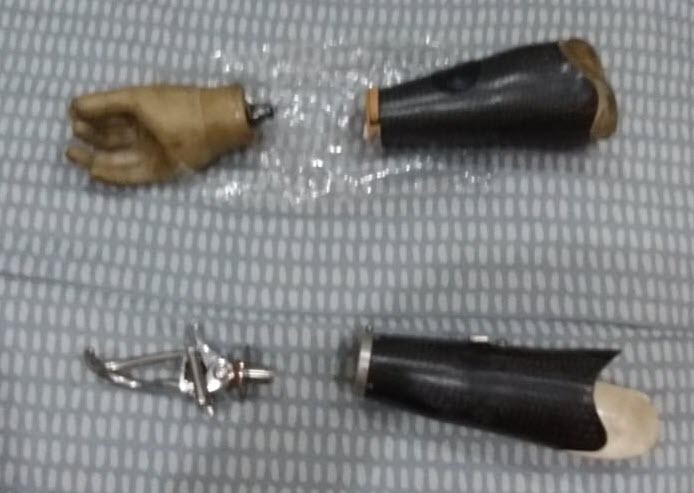
Touch Hand Sockets (select link to read more) have previously relied on ready-made solutions which have to be imported with significant lead times, are hugely expensive, and are incredibly uncomfortable & heavy for the amputee - this has resulted in many amputees abandoning their prostheses in favour of rather adapting to simply using their remaining limbs as a workable solution...
As such this aspect of the overall Touch Hand project looked to address this exact problem with the intention of ultimately creating a socket that was:
-
aesthetically pleasing
-
comfortable to wear and lightweight
-
functional in that it would assist the amputee in daily life tasks
-
customizeable to each amputee's specific requirements
-
durable to cope with the rigours of daily life
Project Diary
Design Challenges 01
Another nice surprise awaited the team when we were informed that no plans had been made by the previously involved students to design or manufacture the socket for the structure for the Cybathlon - the joys of inheriting someone else's mess!
Either way, we were quickly in touch with our composite guru, Arno Seyfert, from Custom Works and a meeting was set-up to discuss the way forward, the procedures that we needed to follow, and the materials that we would need to order.
We were also very fortunate to have the voluntary services of Lungile Dick, from VWSA, as our amputee pilot which would allow real-world fitment as well as testing of the device as we went along. This was a major boost to the project as the Socket would have to be a bespoke device.
Traditional devices tend to be costly, unwieldy, heavy, uncomfortable and lacking in functionality which means that most users just dispense of them and prefer to use their own limbs as best they can....we would be hoping to overcome this...
Plans to do a scan as well as a physical mould were targeted for mid-March...
General 01
The looming CoVid19 pandemic were going to severely restrict the team's capabilities from mid-March onwards and we would be forced into an online communication and co-operation scenario - fortunately, we were able to get several things done in the Lab prior to the national shutdown towards the end of the month.
Attentions would also turn to other more urgent needs (Intubation Unit) during the shutdown period, so the Touch Hand would go onto a more measured development phase due to its longer term completion targets.
Design Development 01
The material needed for the physical socket lay-up was acquired, and both the scan and the physical lay-up were planned for early in March.
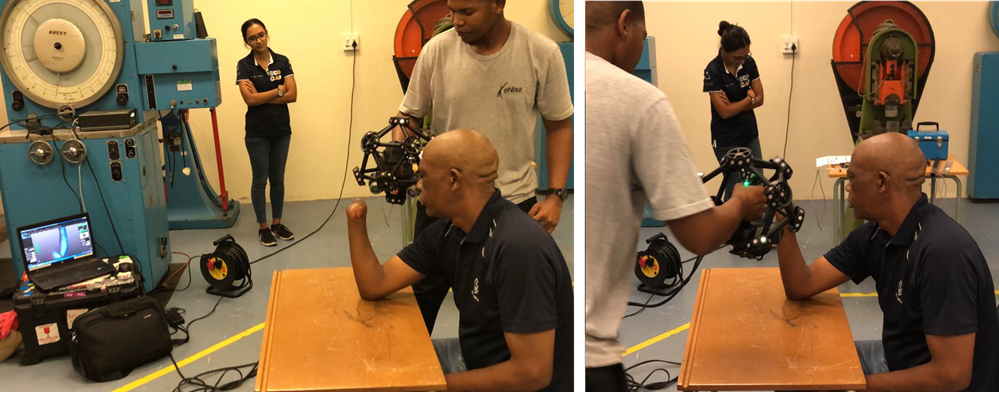
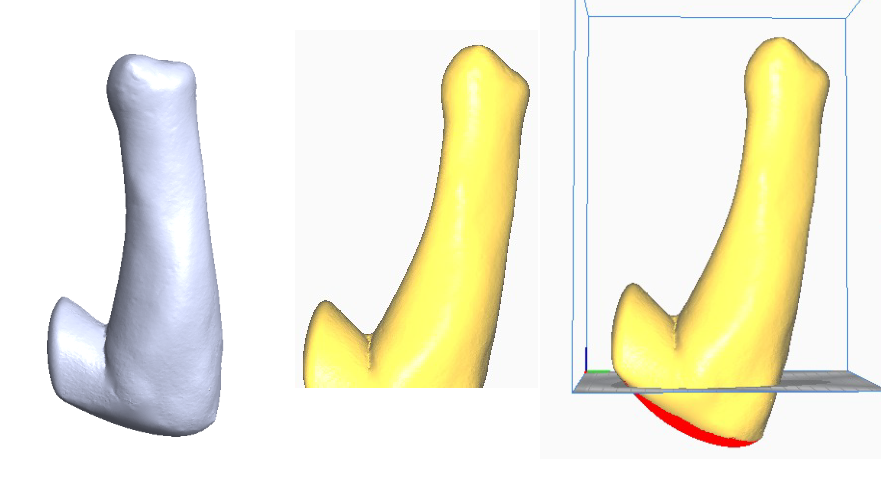
The scan was carried out using the Creaform MetraSCAN 3D scan equipment from eNtSA as depicted below...this would produce a 3D surface model of Lungile's arm which could then be 3D printed for use as reference or for sizing purposes iro the wrist and socket design to follow.
At the same time, the team attempted to do a physical mold using a paint-on technique of silicon to achieve an accurate replica of his arm - this was the first time the team had attempted this technique, and all went well up until the curing phase, when it became clear that the catalyst to silicone ratio had to be significantly more precise; parts of the mould were setting well whilst others were remaining sticky well after the fact, despite various attempts to help the process along...Lungile's patience during this being well and truly tested!
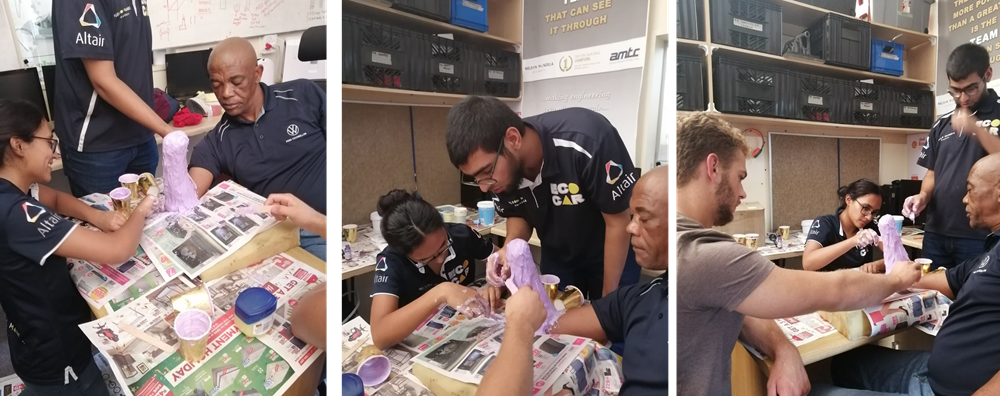
It was decided to abandon this attempt and redo it at a later stage when everyone was available once more - as the whole process was done in successive stages, more careful control of catalyst to silicon ratio would be needed to ensure a consistent curing process.
This was planned for the last few weeks of March, but would be postponed due to the restrictions of the CoVid19 pandemic...
General 02
Progress in April was to be severely restricted as a result of the continued national CoVid19 shutdown throughout the entire month, but the team was still able to make really good progress in their respective sectors despite the challenges of working remotely; meetings were restricted to purely online as was co-ordination and co-operation in developing the entire structure, and this proved to be extremely challenging for engineering design especially when developing a multi-disciplined prototype.
Design & Development 02
Around this time, we received the scan models back and started preparing for a 3D print as a reference for fitment options.
the model was split in the forearm section into two pieces so that it could be printed on our smaller 3D printer bed, and would then glue these sections together after the fact.
General 03
The national shutdown continued into May so again everyone continued working remotely from each other, which made things extremely challenging but, despite this, good progress was being made.
Design & Development 03
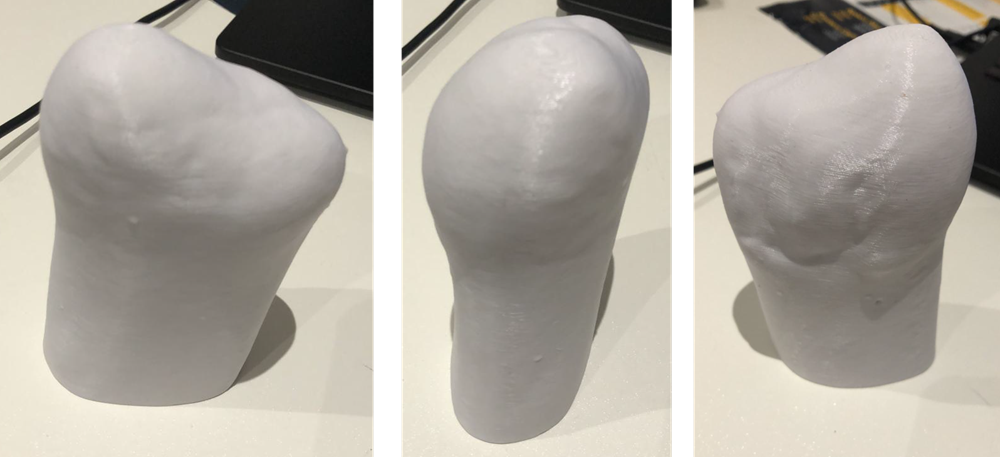
After a few delays to attend to other issues, the print of the arm scan was carried out - due to the limited bed size of our available printer, we were forced to break the arm into sections; this proved to be a challenge due to the size of the model scan file (software limitation alert!), but after jumping through multiple options and hoops, we finally managed to come up with a truncated version that would be useful for fitment purposes.
The model was broken up into multiple parts with the top section first being printed out as shown below - we were fairly pleased with the result. Next would be the middle/lower section.
General 04
The national shutdown continued into June, then July, and then August, and so on and on....until the Cybathlon itself was imminent...so we had to face the fact that the entire project had to be completed with the team working remotely from each other, which made this a somewhat unique endeavour for the team.
Design & Development 04
The next few months leading up to the Cybathlon event itself blurred into one long stretch, hence this development area being melded into one series of events...
Arm Print
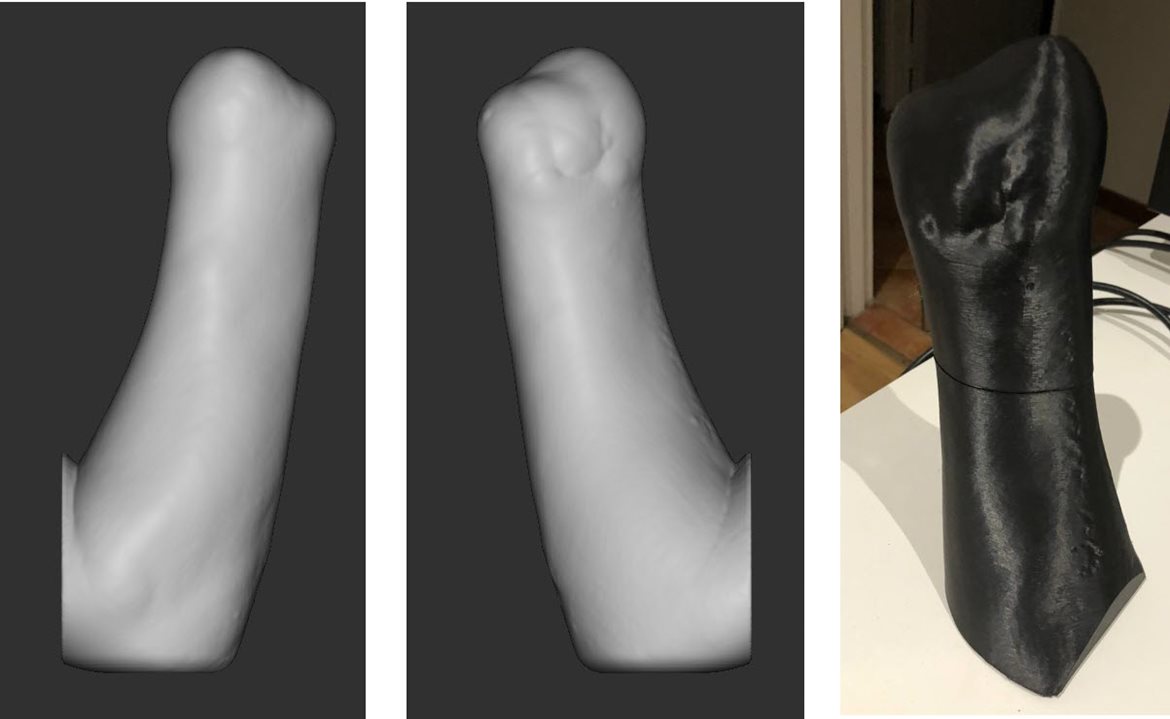
The remainder of the arm print was completed until a full life-sized replica had been produced - this would prove invaluable in the months to come, especially as the shutdown limited contact iro fitment. The usual computer vs real-world challenges were to arise several times too, so having a physical model on hand at several remote venues was going to streamline communication and development between the design team.
Design Strategy
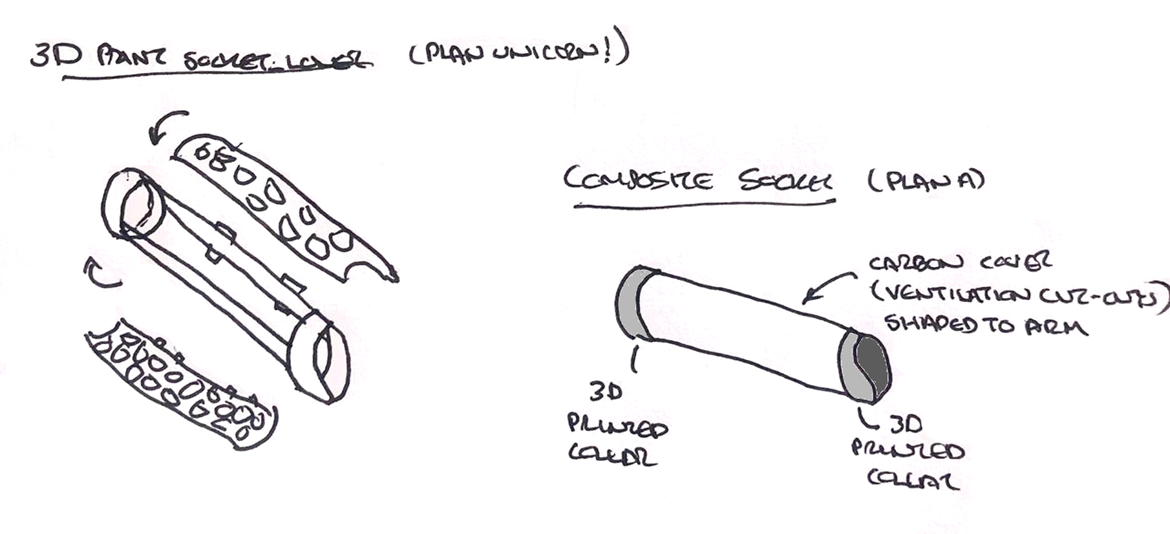
It was decided quite early on to create a two option socket design going forward as follows:
Plan A: would be a carbon-fibre composite mid structure bracketed by two 3D-printed (AM) collars for fitment and integration into the Touch Hand itself. this would be easily achievable as we had the materials and the expertize in-house whilst also having the guidance from long-term collaborator Arno Seyfert from Custom Works to ensure that things were properly done and a product of quality was ultimately produced.
Plan B: would be a fully 3D-printed option including integrated collars for fitment & attachment to the Touch Hand together with a latticed mid-section for breathability and comfort.
Both options would fully meet the project objectives, and while Plan A was the easily achievable one, Plan B was the unicorn plan due to expense and manufacturing availability.
Wrist Cup
The first task was to establish a detailed wrist cup based on the arm scan...this would enable good snug fitment of the Touch Hand-Socket structure onto the remaining limb, ensuring no slip or rotation whilst using the device. the wrist cup would be ultimately integrated into the wrist of the Touch Hand, which would then attached to the socket via two quick-release tabs, capable of being operated by the amputee pilot's opposite hand.
The top section of the arm scan would be shelled to create a Sock and this would be the basis for the design of the Wrist Sock and Elbow Sock; this in turn would be further shelled to create the basis for the Socket itself.
The wrist cup was separated and then modelled and printed...it was then tried out for fitment using a standard thick sock to have a look if there were any obvious interference issues. Everything turned out well, and this allowed the next design phase which would be the development of the Wrist Glove, the Elbow Glove and the Socket itself.
Wrist & Elbow Glove
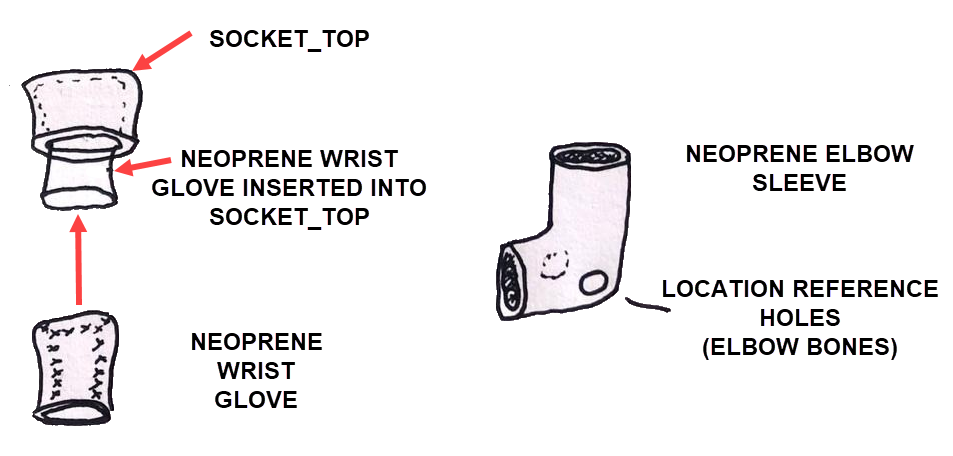
The inner surface of the Wrist Cup would be the basis for a flat pattern to design the Wrist Glove which would be made out of neoprene - this would provide a comfort aspect as well as ensuring a secure non-slip fit between the limb and the Wrist Cup.
This surface was extracted and analyzed and then optimized for best flat patterning to ensure non-crimping and minimal use of material - once this had been achieved, a 1:1 pattern was printed out and a test pattern was cut out of light denim material to create a test glove for fitment purposes.
This turned out really well for a first try effort and fitted very well onto the arm scan plastic print, so enabled the production of the final glove. It seemed we had branched out our skillset in seamstering as well...
A similar process was followed for the elbow glove, except here provision for reference locations and the consistent positioning of EMG sensors needed to be made.
Both items were manufactured and tested out via the amputee pilot and proved to be very comfortable and well fitted.

Socket
The next step was the development of the socket itself - this was broken into two separate tasks: the composite socket and then the 3D printed socket (if time and possibility allowed!)
Composite Socket
The composite socket was intended as the quickest solution, particularly iro looming time constraints - the outer socket shell model was printed as an initial design for fitment purposes.
The next stage of the development was to integrate the two bracketing collars into the structure - this was decided very early to be 3D-printed components to allow for continuous iteration as the manufacture occurred.
Once the structure was designed, an inner mold was printed and lay-up would occur around this - lay-up was scheduled over a couple of days at Custom Works in Jeffreys Bay, under the strict supervision of owner Arno Seyfert, who quickly whipped the guys into shape should they make any dumb errors!
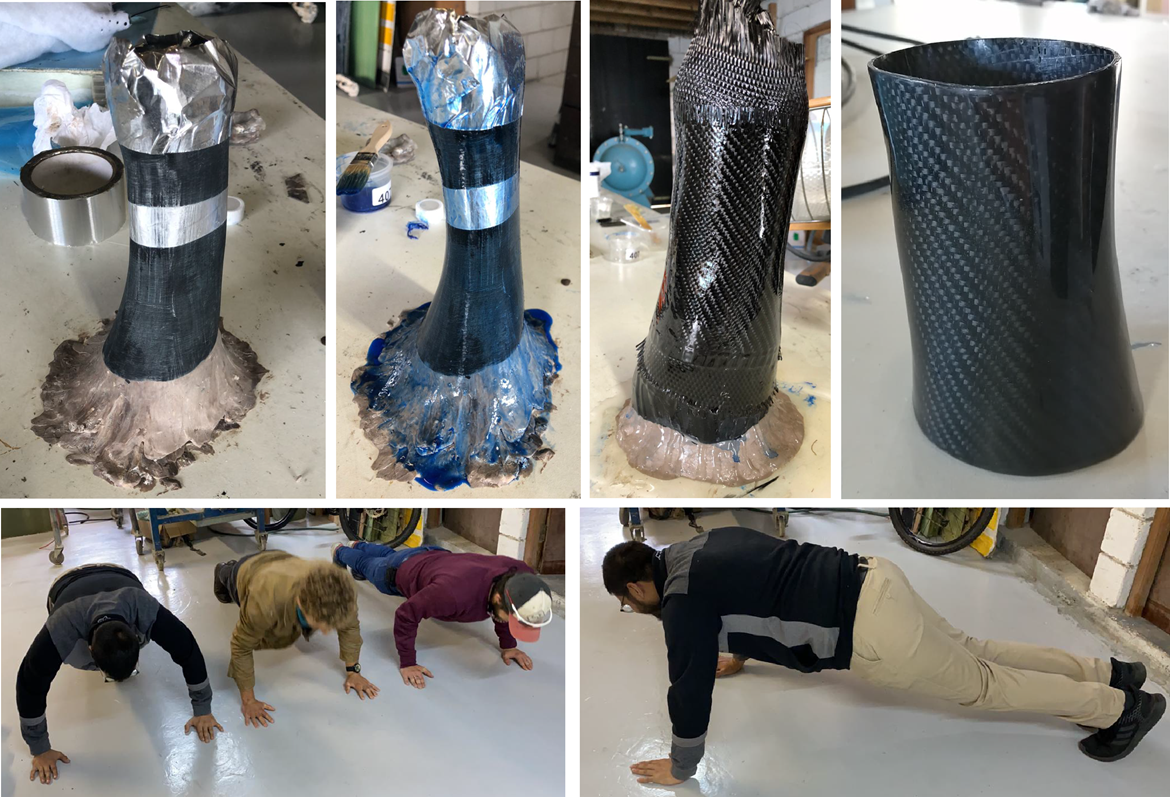
Once curing had sufficiently occurred, the resulting composite mid-section was cut to size and then tested for fitment into the 3D-printed collars. Finally, once the details of the collars iro attachment to the hand itself was finalized, the collars would then be glued to the composite mid-structure to create the final completed composite socket, which was achieved in early October for testing.
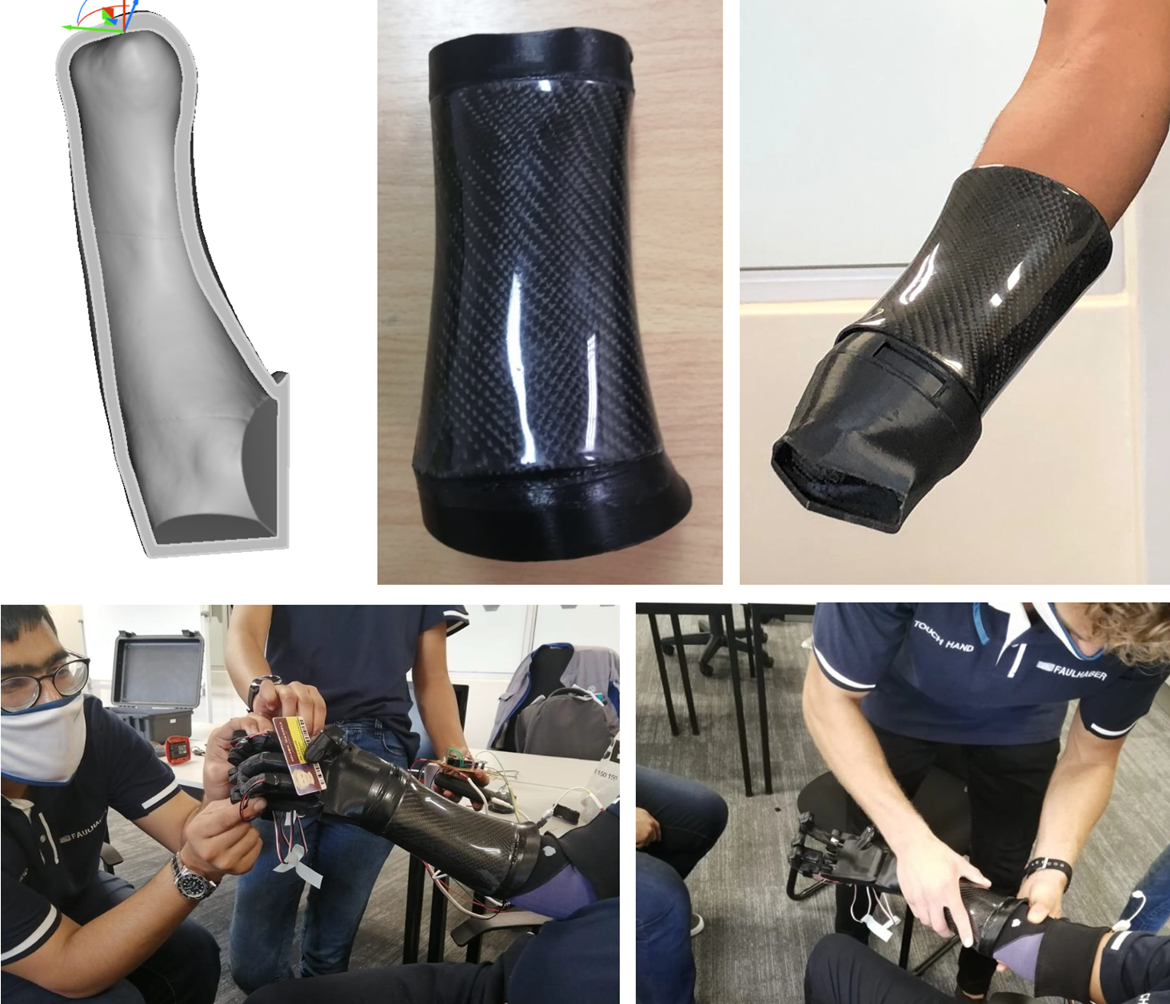
Plan A was sorted and was working perfectly in the testing scenario; so all good! the next step was to try and get the 3D-Printed Socket done...
3D-Printed Socket
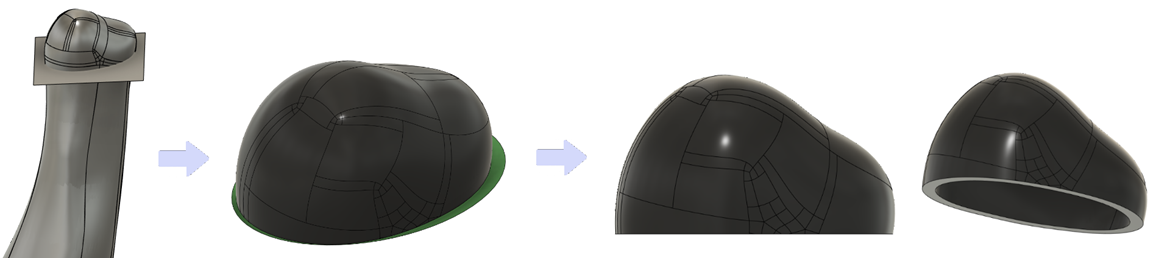
The 3D-Printed socket was inspired by a number of similar latticed braces out on the internet - the intention was to create an integrated latticed socket into the current collar designs which would be aesthetically extremely cool, but more importantly provide breathability for the lower forearm limb as well as being a one-piece device.
This was to prove considerably more challenging than initially anticipated, mainly due to the limitations of current CAD platforms which are parametrically based - the gap we needed on this project was acquiring access to the nTopology platform, an implicit software package that employs an entirely different design mindset in terms of the methodology of component creation. Although, we were relatively new to the nTopology platform, it soon became our go-to package iro the Socket design (as well as several other intricate projects currently on the go) even though there was a steep learning curve. Impossible tasks in parametric platforms suddenly became incredibly easy to achieve.
The process here was to initially create the shells, then define the lattice on the implicit model and utilize various boolean functions to get to where we wanted to be. Sounds simple, but it took quite a bit of head-scratching to get there in the end. After very many revisions, a really cool output was achieved - the print was not possible using our in-house printer, but...once again, Rapid3D came charging in to the rescue and managed to fit the print into one of their production runs. This was then shipped to us to try fitment and to look at problem issues...
This was a trial run without the fastening options built into the collars so was not really useable, and there were obvious problems which appeared to be a combined result of our lack of experience and from the translation process from implicit back into parametric models, but we at least had a really good starting point.
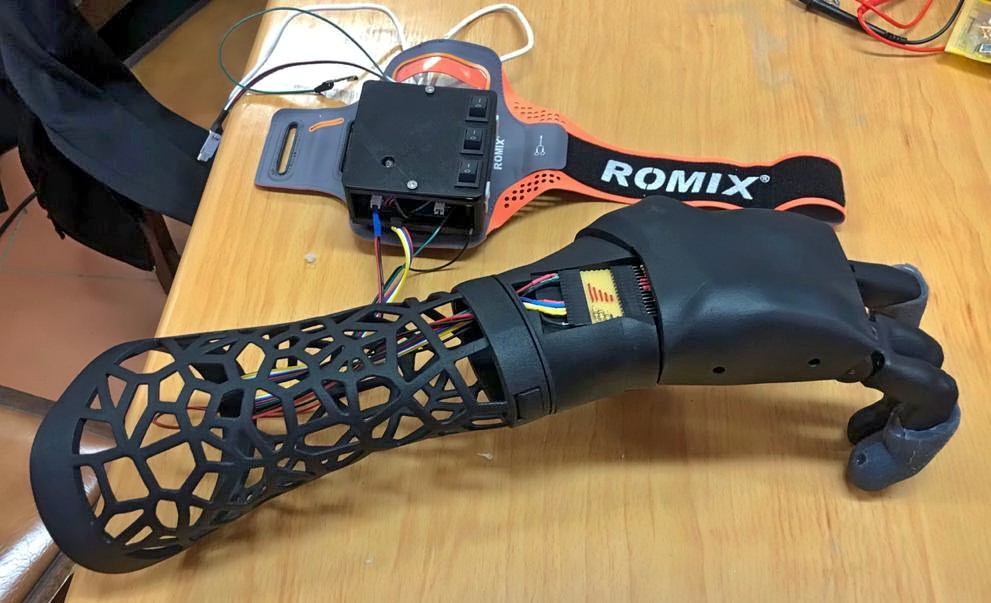
At the next test of the electronics response, the latticed socket was tried for fitment and was to prove very comfortable and, even in this early form, showed a lot of promise going forward.
The next iteration would include the updated collars with fastening devices integrated and the lattice structure thinned and cleaned up considerably - this was quite a process using multiple platforms to eliminate various artifacts from the implicit design process but resulted in a final output that was ready for a final print run; this was also just a week before competition, so the possibility of utilizing the latticed arm in the event was looking very good.
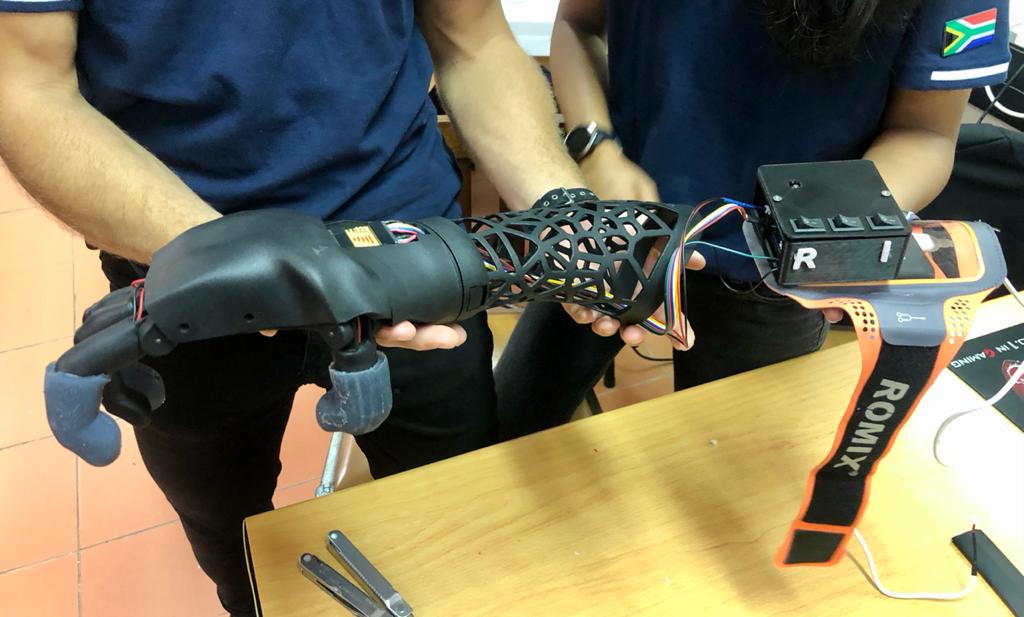
We were to travel to Durban on the Sunday prior to the event, and pick up the the printed components from Rapid3D on the Monday with testing to begin later in the day - as usual the usual time-crush was there and the pressure was on. Pleasingly, and expectedly, the prints were awesome and looked just stunning, especially when integrated with the Touch hand itself. Testing began immediately that afternoon...
The next huge challenge would be the event itself after an intensive three-days of repeated testing.
Contributors
Huge thanks & appreciation must go out to all these individuals for their completely selfless contribution to this, be it for information, advice, their time, their contacts, their services, or whatever contribution they made, no matter how big or small.
AEDG Team (Clive Hands, Dr William Rall, Zaahid Imran, Jode Fourie, Daniel Trask, Sthuthi Varghese)
Rapid3D (David Bullock, Lynton Dent)
VWSA (Lungile Dick, Liza Wilmot)
Jendamark (Yanesh Naidoo, Charl Rossouw)
eNtSA (Prof Danie Hattingh, Amy van Gend, Andile Msimang)
nTopology (Liz Arum)
Livingstone Hospital (Dr Bryan Theunissen)
Custom Works (Arno Seyfert)
Stopforth Robotics Laboratory (Prof Riaan Stopforth)
Axiology Labs (Gideon Burger)
Nicky Roote Physiotherapy (Nicky Roote, Micha Cronje)
NMU Medical School (Dr Zithulele Tshabalala)